2.3 Switch and Checkbox — RGB LED Control
Control the onboard WS2812 LED with LVGL switch and checkbox widgets.
Overview
This is the first LVGL project where the touchscreen directly controls physical hardware. A Switch toggles the LED on and off, and six Checkboxes (radio-button style) select the LED’s colour.
What You’ll Learn
Creating switches (
lv_switch) and checkboxes (lv_checkbox)Implementing single-selection radio-button behaviour
Linking LVGL events to hardware control (
neopixelWrite())Styling checkbox indicators with custom colours
Before You Begin
Complete the setup steps in Preparation before continuing.
Note
Use the recommended Arduino IDE settings in Recommended Board Settings unless this lesson says otherwise.
Open the example sketch from the code package:
LAFVIN-ESP32-S3-Multimedia-Kit-main/2.LVGL/03_LVGL_GPIO/03_LVGL_GPIO.ino
Signal |
ESP32-S3 |
|---|---|
LED DATA |
GPIO 48 |
Upload and Test
Connect the board with a USB Type-C data cable.
Open
03_LVGL_GPIO.inoin Arduino IDE.In the Tools menu, select
ESP32S3 Dev Moduleas the board and choose the correct serial port.Click Upload.
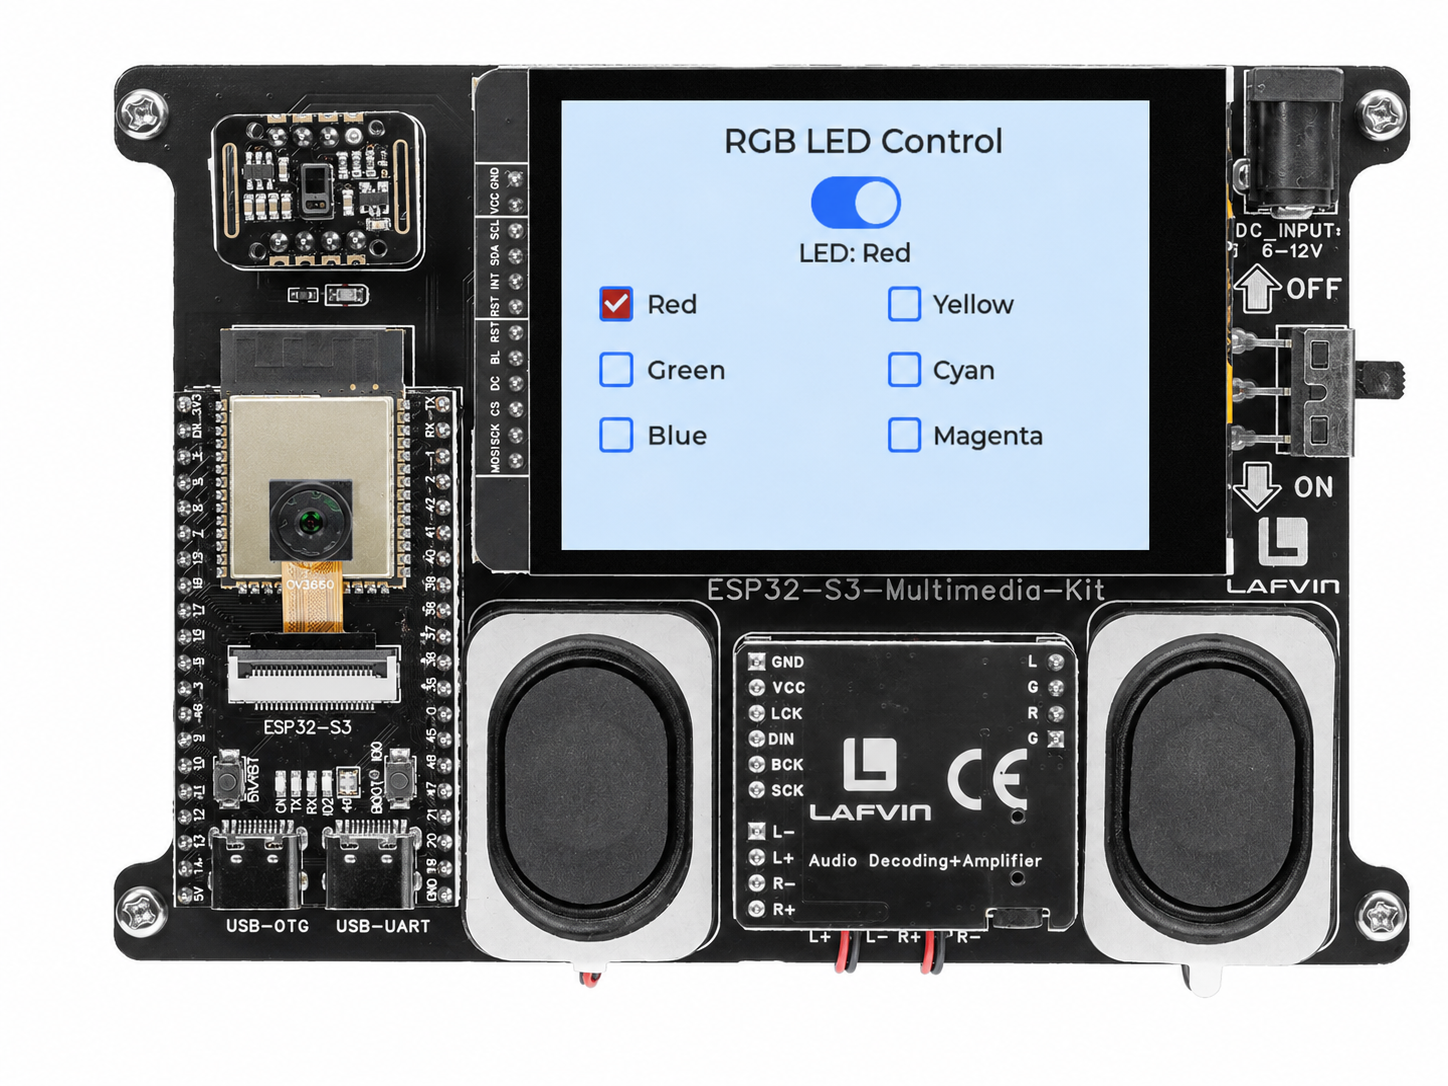
On the screen you see:
A master Switch — toggle it to turn the LED on or off
Six colour checkboxes: Red, Green, Blue, Yellow, Cyan, Magenta
A status label showing the current LED state
Flip the master switch on, then tap any colour checkbox. The onboard WS2812 LED changes colour immediately. Only one colour can be selected at a time — tapping a new one deselects the previous.
How the Code Works
The demo is self-contained in 03_LVGL_GPIO.ino.
LED Control Helper
A ledWrite() function scales each RGB channel by a global BRIGHTNESS factor (set to 25 to avoid dazzling) and calls neopixelWrite() to update the onboard WS2812. The updateLED() function reads the master switch state and either applies the selected colour or turns the LED off, updating the status label accordingly.
void ledWrite(uint8_t r, uint8_t g, uint8_t b) {
  uint8_t r_scaled = (r * BRIGHTNESS) / 255;
  uint8_t g_scaled = (g * BRIGHTNESS) / 255;
  uint8_t b_scaled = (b * BRIGHTNESS) / 255;

  neopixelWrite(LED_PIN, r_scaled, g_scaled, b_scaled);
}

void updateLED() {
  bool is_on = lv_obj_has_state(main_switch, LV_STATE_CHECKED);

  if(is_on) {
    ledWrite(colors[selected_color].r,
             colors[selected_color].g,
             colors[selected_color].b);
    lv_label_set_text_fmt(label_status, "LED: %s", colors[selected_color].name);
  } else {
    ledWrite(0, 0, 0);
    lv_label_set_text(label_status, "LED: OFF");
  }
}
Master Switch
The switch listens for LV_EVENT_VALUE_CHANGED and calls updateLED() on every toggle. The lv_obj_has_state() check inside updateLED() handles both on and off cases.
  main_switch = lv_switch_create(lv_scr_act());
  lv_obj_align(main_switch, LV_ALIGN_TOP_MID, 0, 40);
  lv_obj_add_event_cb(main_switch, switch_event_handler, LV_EVENT_VALUE_CHANGED, NULL);

static void switch_event_handler(lv_event_t * e) {
  if(lv_event_get_code(e) == LV_EVENT_VALUE_CHANGED) {
    updateLED();
  }
}
Radio-Style Checkboxes
Six colours are defined in a ColorOption struct array, each with a name, RGB values, and an lv_obj_t* pointer to its checkbox widget. The checkbox_event_handler() implements single-selection: when a checkbox is checked, it clears the LV_STATE_CHECKED state on all other checkboxes via a nested loop, then updates the selected_color index.
typedef struct {
  const char* name;
  uint8_t r;
  uint8_t g;
  uint8_t b;
  lv_obj_t* checkbox;
} ColorOption;

static ColorOption colors[] = {
  {"Red",     255, 0,   0,   NULL},
  {"Green",   0,   255, 0,   NULL},
  {"Blue",    0,   0,   255, NULL},
  {"Yellow",  255, 255, 0,   NULL},
  {"Cyan",    0,   255, 255, NULL},
  {"Magenta", 255, 0,   255, NULL}
};

static void checkbox_event_handler(lv_event_t * e) {
  if(lv_event_get_code(e) != LV_EVENT_VALUE_CHANGED) return;
  lv_obj_t * obj = lv_event_get_target(e);

  for(int i = 0; i < 6; i++) {
    if(colors[i].checkbox == obj) {
      for(int j = 0; j < 6; j++) {
        if(j != i) {
          lv_obj_clear_state(colors[j].checkbox, LV_STATE_CHECKED);
        }
      }
      selected_color = i;
      updateLED();
      break;
    }
  }
}
Each checkbox’s indicator is styled to match its colour using lv_obj_set_style_bg_color() on LV_PART_INDICATOR | LV_STATE_CHECKED.
In the provided sketch:
The six checkboxes are laid out in two columns of three using integer division (
col = i / 3,row = i % 3)The first colour (Red) is pre-selected via
lv_obj_add_state(colors[0].checkbox, LV_STATE_CHECKED)BRIGHTNESSis 25 — increase it for a brighter LED, but values above ~50 may be uncomfortably bright
Try This Next
Increase
BRIGHTNESSfrom 25 if you want a brighter LEDAdd more pre-set colours (orange, pink, white, etc.)
Read the switch state in
loop()and blink the LED independently of the screen