2.11 RGB LED Control Panel
An advanced WS2812 LED controller with brightness, colour presets, and animation modes.
Overview
Building on the simpler switch/checkbox LED control from 2.3 Switch and Checkbox — RGB LED Control, this example creates a dedicated LED control panel. It adds a live colour preview, brightness slider, six colour preset buttons, and four animation modes — all updating the onboard WS2812 LED in real time.
What You’ll Learn
Building a single-purpose control panel with multiple widgets
Scaling RGB values proportionally for brightness control
Implementing LED animation patterns (Static, blink, breath, rainbow)
Using
millis()-based non-blocking timing for animations
Before You Begin
Complete the setup steps in Preparation before continuing.
Note
Use the recommended Arduino IDE settings in Recommended Board Settings unless this lesson says otherwise.
Open the example sketch from the code package:
LAFVIN-ESP32-S3-Multimedia-Kit-main/2.LVGL/11_LVGL_RGB/11_LVGL_RGB.ino
Signal |
ESP32-S3 |
|---|---|
LED DATA |
GPIO 48 |
Upload and Test
Connect the board with a USB Type-C data cable.
Open
11_LVGL_RGB.inoin Arduino IDE.In the Tools menu, select
ESP32S3 Dev Moduleas the board and choose the correct serial port.Click Upload.
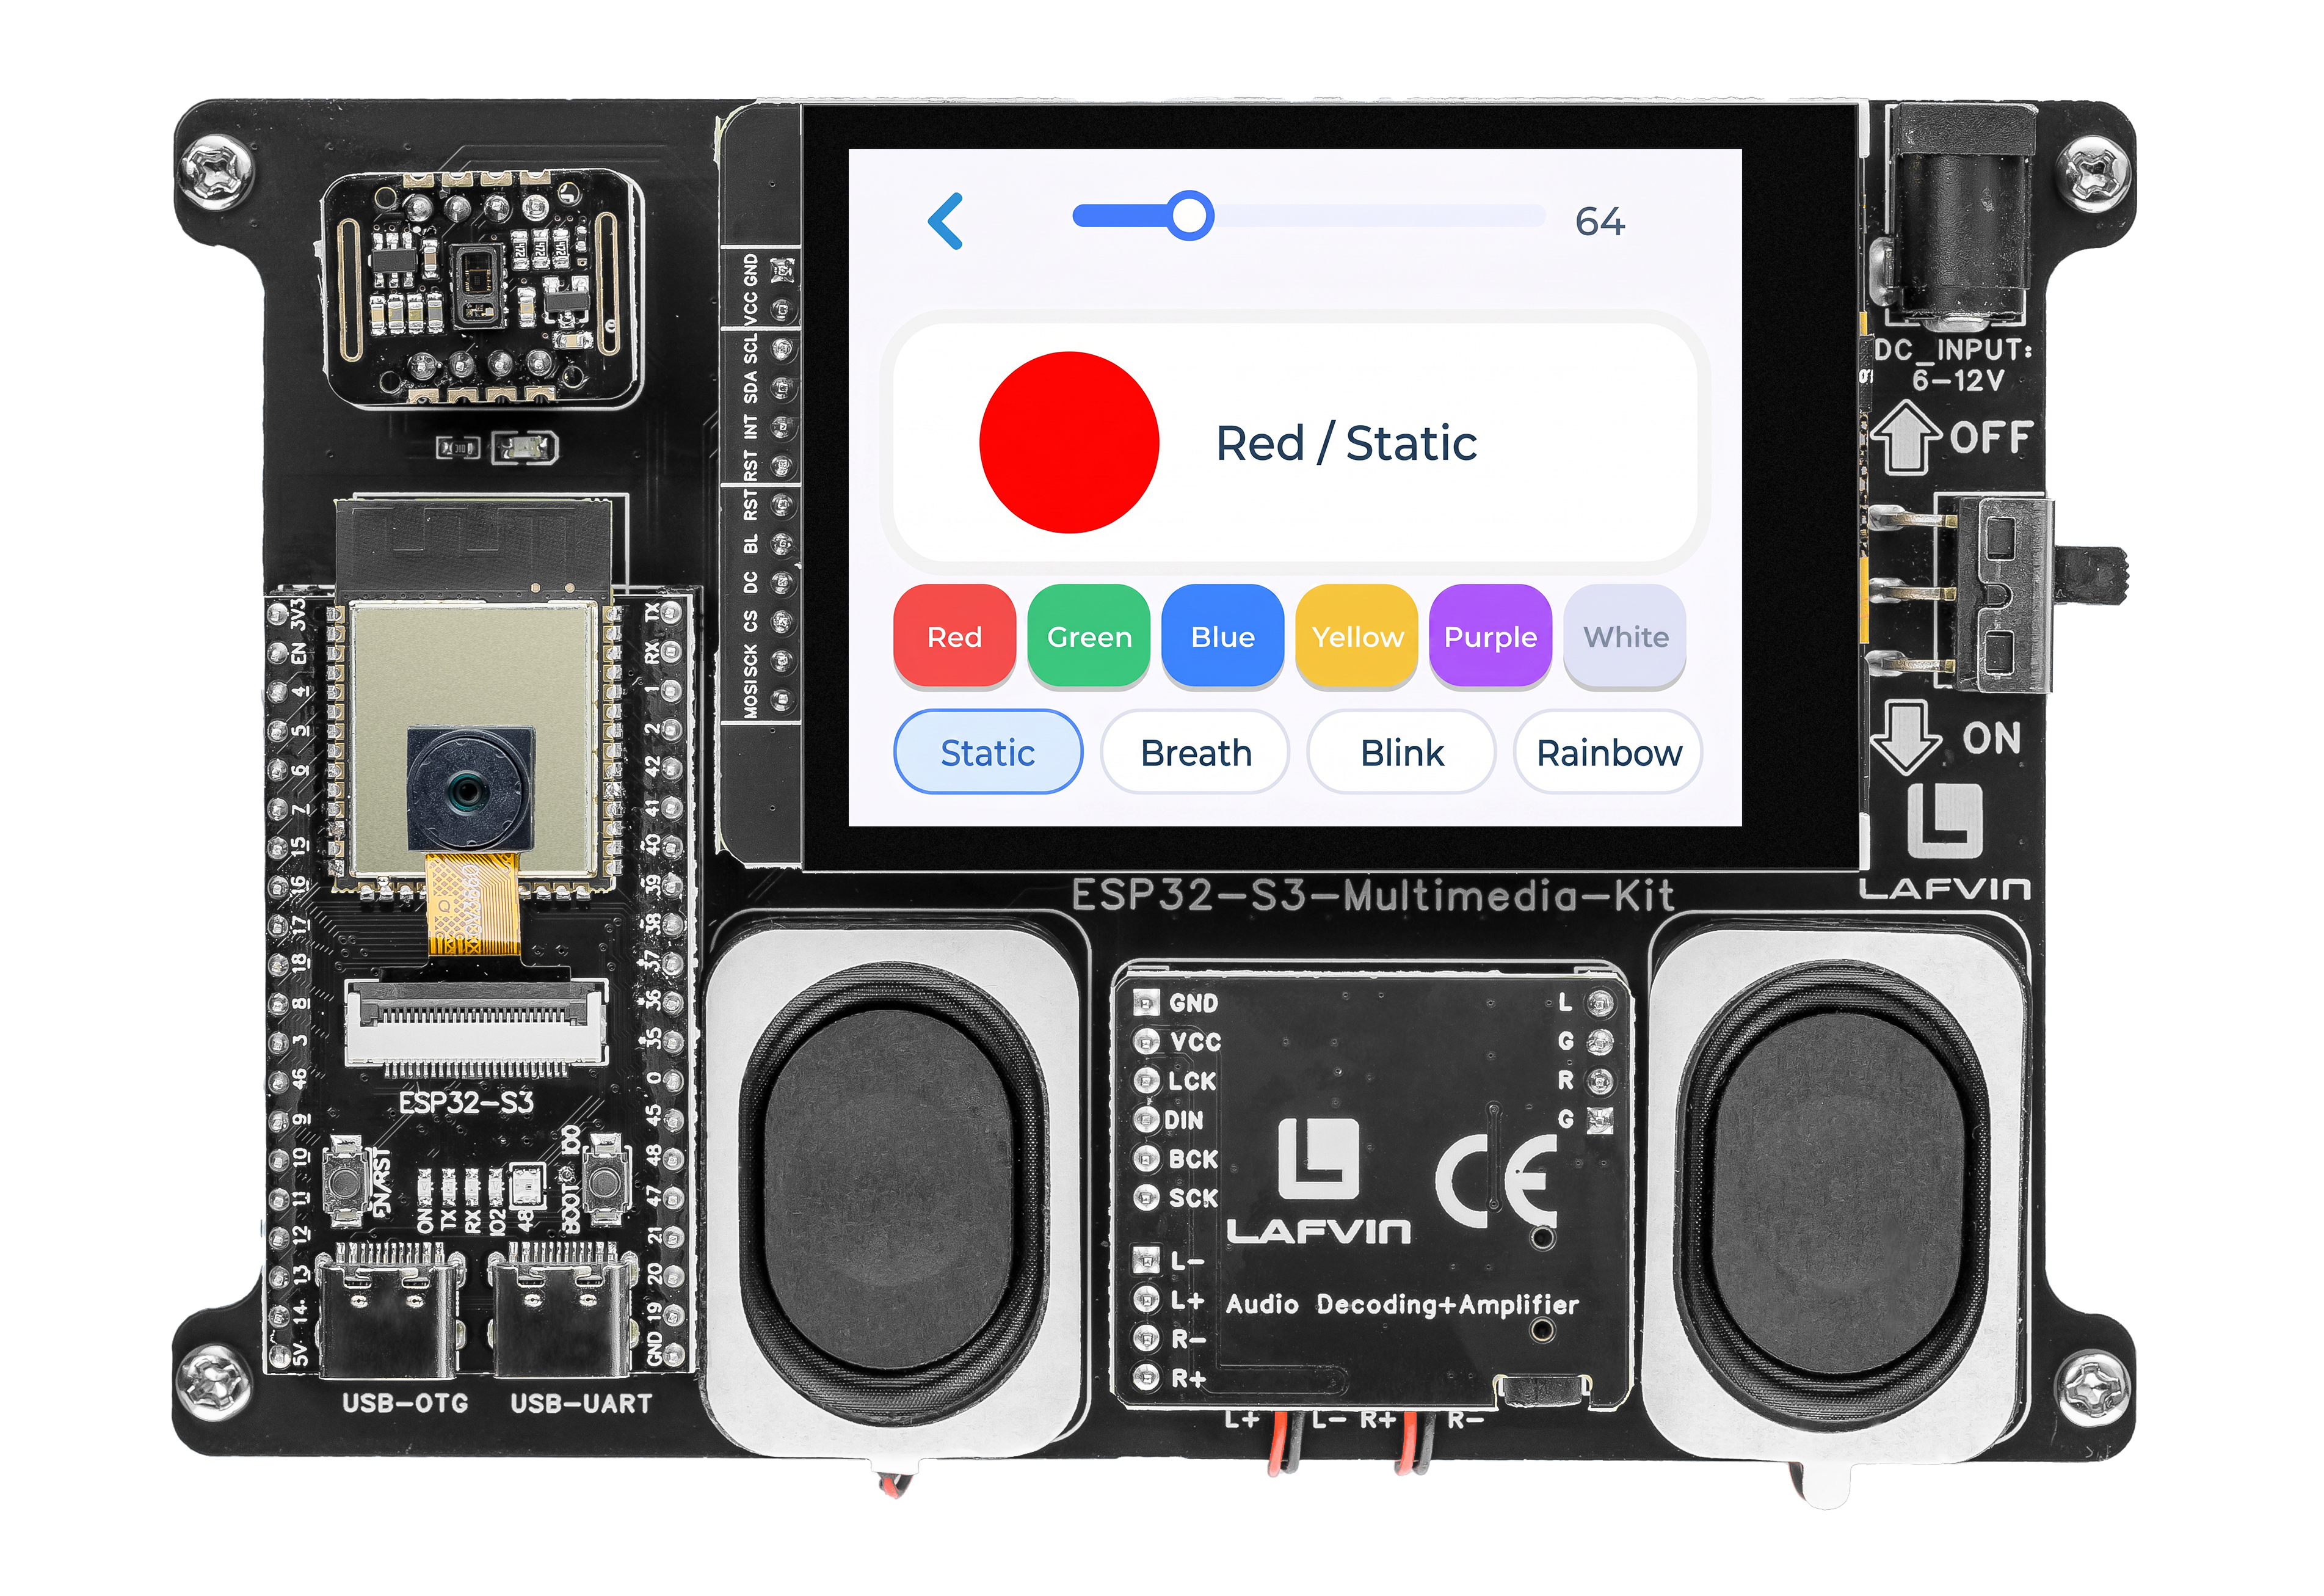
The screen shows an LED control panel:
A circular colour preview panel
A brightness slider (0–255)
Six colour preset buttons: Red, Green, Blue, Yellow, Purple, White
Four animation mode buttons: Static, Breath, Blink, Rainbow
Tap a colour preset to see it on the preview panel and the physical LED. Drag the brightness slider to dim or brighten. Tap an animation mode to start an automatic sequence — tap Static to return to manual control.
How the Code Works
The RGB control logic is mainly implemented in RGB_ui.cpp.
LED Brightness Control
The write_led() function scales each RGB channel by the brightness value using 16-bit intermediate arithmetic to avoid overflow. The brightness slider (range 0–255) triggers a dirty flag on change rather than writing the LED directly.
void write_led(uint8_t r, uint8_t g, uint8_t b, uint8_t brightness) {
  const uint8_t r_scaled = static_cast<uint8_t>((static_cast<uint16_t>(r) * brightness) / 255);
  const uint8_t g_scaled = static_cast<uint8_t>((static_cast<uint16_t>(g) * brightness) / 255);
  const uint8_t b_scaled = static_cast<uint8_t>((static_cast<uint16_t>(b) * brightness) / 255);
  neopixelWrite(RGB_LED_PIN, r_scaled, g_scaled, b_scaled);
}

void brightness_slider_event_handler(lv_event_t *e) {
  if (lv_event_get_code(e) != LV_EVENT_VALUE_CHANGED) {
    return;
  }

  s_brightness = static_cast<uint8_t>(lv_slider_get_value(g_rgb_ui.brightness_slider));
  s_ui_dirty = true;
}
Colour Presets
Six preset colours are defined in a RgbPreset struct array, each with a name, RGB value, and on-screen button colour. Tapping a preset stores the base colour and marks the UI as dirty, so the next refresh cycle applies it.
constexpr RgbPreset kPresets[] = {
  {"Red", 255, 0, 0, 0xF04E4E},
  {"Green", 0, 255, 0, 0x3CCB7F},
  {"Blue", 0, 110, 255, 0x3A86FF},
  {"Yellow", 255, 210, 0, 0xF4C542},
  {"Purple", 186, 85, 211, 0xA855F7},
  {"White", 255, 255, 255, 0xD9E1F2},
};

void preset_button_event_handler(lv_event_t *e) {
  if (lv_event_get_code(e) != LV_EVENT_CLICKED) {
    return;
  }

  const uintptr_t index = reinterpret_cast<uintptr_t>(lv_event_get_user_data(e));
  select_preset(static_cast<uint8_t>(index));
}

void select_preset(uint8_t index) {
  if (index >= 6) {
    return;
  }

  s_base_r = kPresets[index].r;
  s_base_g = kPresets[index].g;
  s_base_b = kPresets[index].b;
  s_ui_dirty = true;
}
Animation State Machine
All four animation modes (Static, Breath, Blink, Rainbow) are driven by a single update_animation() function that uses millis() for non-blocking timing. Each mode has its own cadence and state.
void update_animation(void) {
  const uint32_t now = millis();

  switch (s_current_mode) {
    case RgbMode::Static:
      return;
    case RgbMode::Breath:
      if (now - s_last_anim_ms < 18) {
        return;
      }
      s_last_anim_ms = now;
      if (s_breath_direction > 0) {
        if (s_breath_level >= s_brightness) {
          s_breath_direction = -1;
        } else {
          s_breath_level = static_cast<uint8_t>(min(255, s_breath_level + 3));
        }
      } else {
        if (s_breath_level <= 8) {
          s_breath_direction = 1;
        } else {
          s_breath_level = static_cast<uint8_t>(s_breath_level - 3);
        }
      }
      s_ui_dirty = true;
      return;
    case RgbMode::Blink:
      if (now - s_last_anim_ms < 380) {
        return;
      }
      s_last_anim_ms = now;
      s_blink_on = !s_blink_on;
      s_ui_dirty = true;
      return;
    case RgbMode::Rainbow:
      if (now - s_last_anim_ms < 24) {
        return;
      }
      s_last_anim_ms = now;
      s_rainbow_hue += 2;
      s_ui_dirty = true;
      return;
  }
}
Each mode sets s_ui_dirty = true when its state changes; the main loop calls refresh_ui() at 16 ms intervals to push updates to the LED and preview widget.
Applying to the LED
The apply_current_led() function routes the active mode’s colour to write_led(). The breath mode reuses the base colour scaled by the animated level; blink toggles between the base colour and off; rainbow converts the current HSV hue to RGB.
void apply_current_led(void) {
  switch (s_current_mode) {
    case RgbMode::Static:
      write_led(s_base_r, s_base_g, s_base_b, s_brightness);
      break;
    case RgbMode::Breath:
      write_led(s_base_r, s_base_g, s_base_b, s_breath_level);
      break;
    case RgbMode::Blink:
      if (s_blink_on) {
        write_led(s_base_r, s_base_g, s_base_b, s_brightness);
      } else {
        write_led(0, 0, 0, 0);
      }
      break;
    case RgbMode::Rainbow: {
      uint8_t r = 0;
      uint8_t g = 0;
      uint8_t b = 0;
      hsv_to_rgb(s_rainbow_hue, 255, 255, &r, &g, &b);
      write_led(r, g, b, s_brightness);
      break;
    }
  }
}
In the provided sketch:
current_preview_color()mirrors the LED state for the on-screen preview circle using the same mode dispatch logicThe preview label shows both the colour name and mode name (e.g.
"Red / Breath")refresh_ui()is rate-limited to ~60 Hz viakUiRefreshMs = 16
Try This Next
Change the blink interval from 500ms to 100ms for a strobe effect
Add your own animation mode (e.g., police lights or colour chase)
Combine preset colours with the breathing animation for smoother transitions