2.15 All-In-One Application
The capstone project: a smartphone-style app launcher that integrates every peripheral and UI module.
Overview
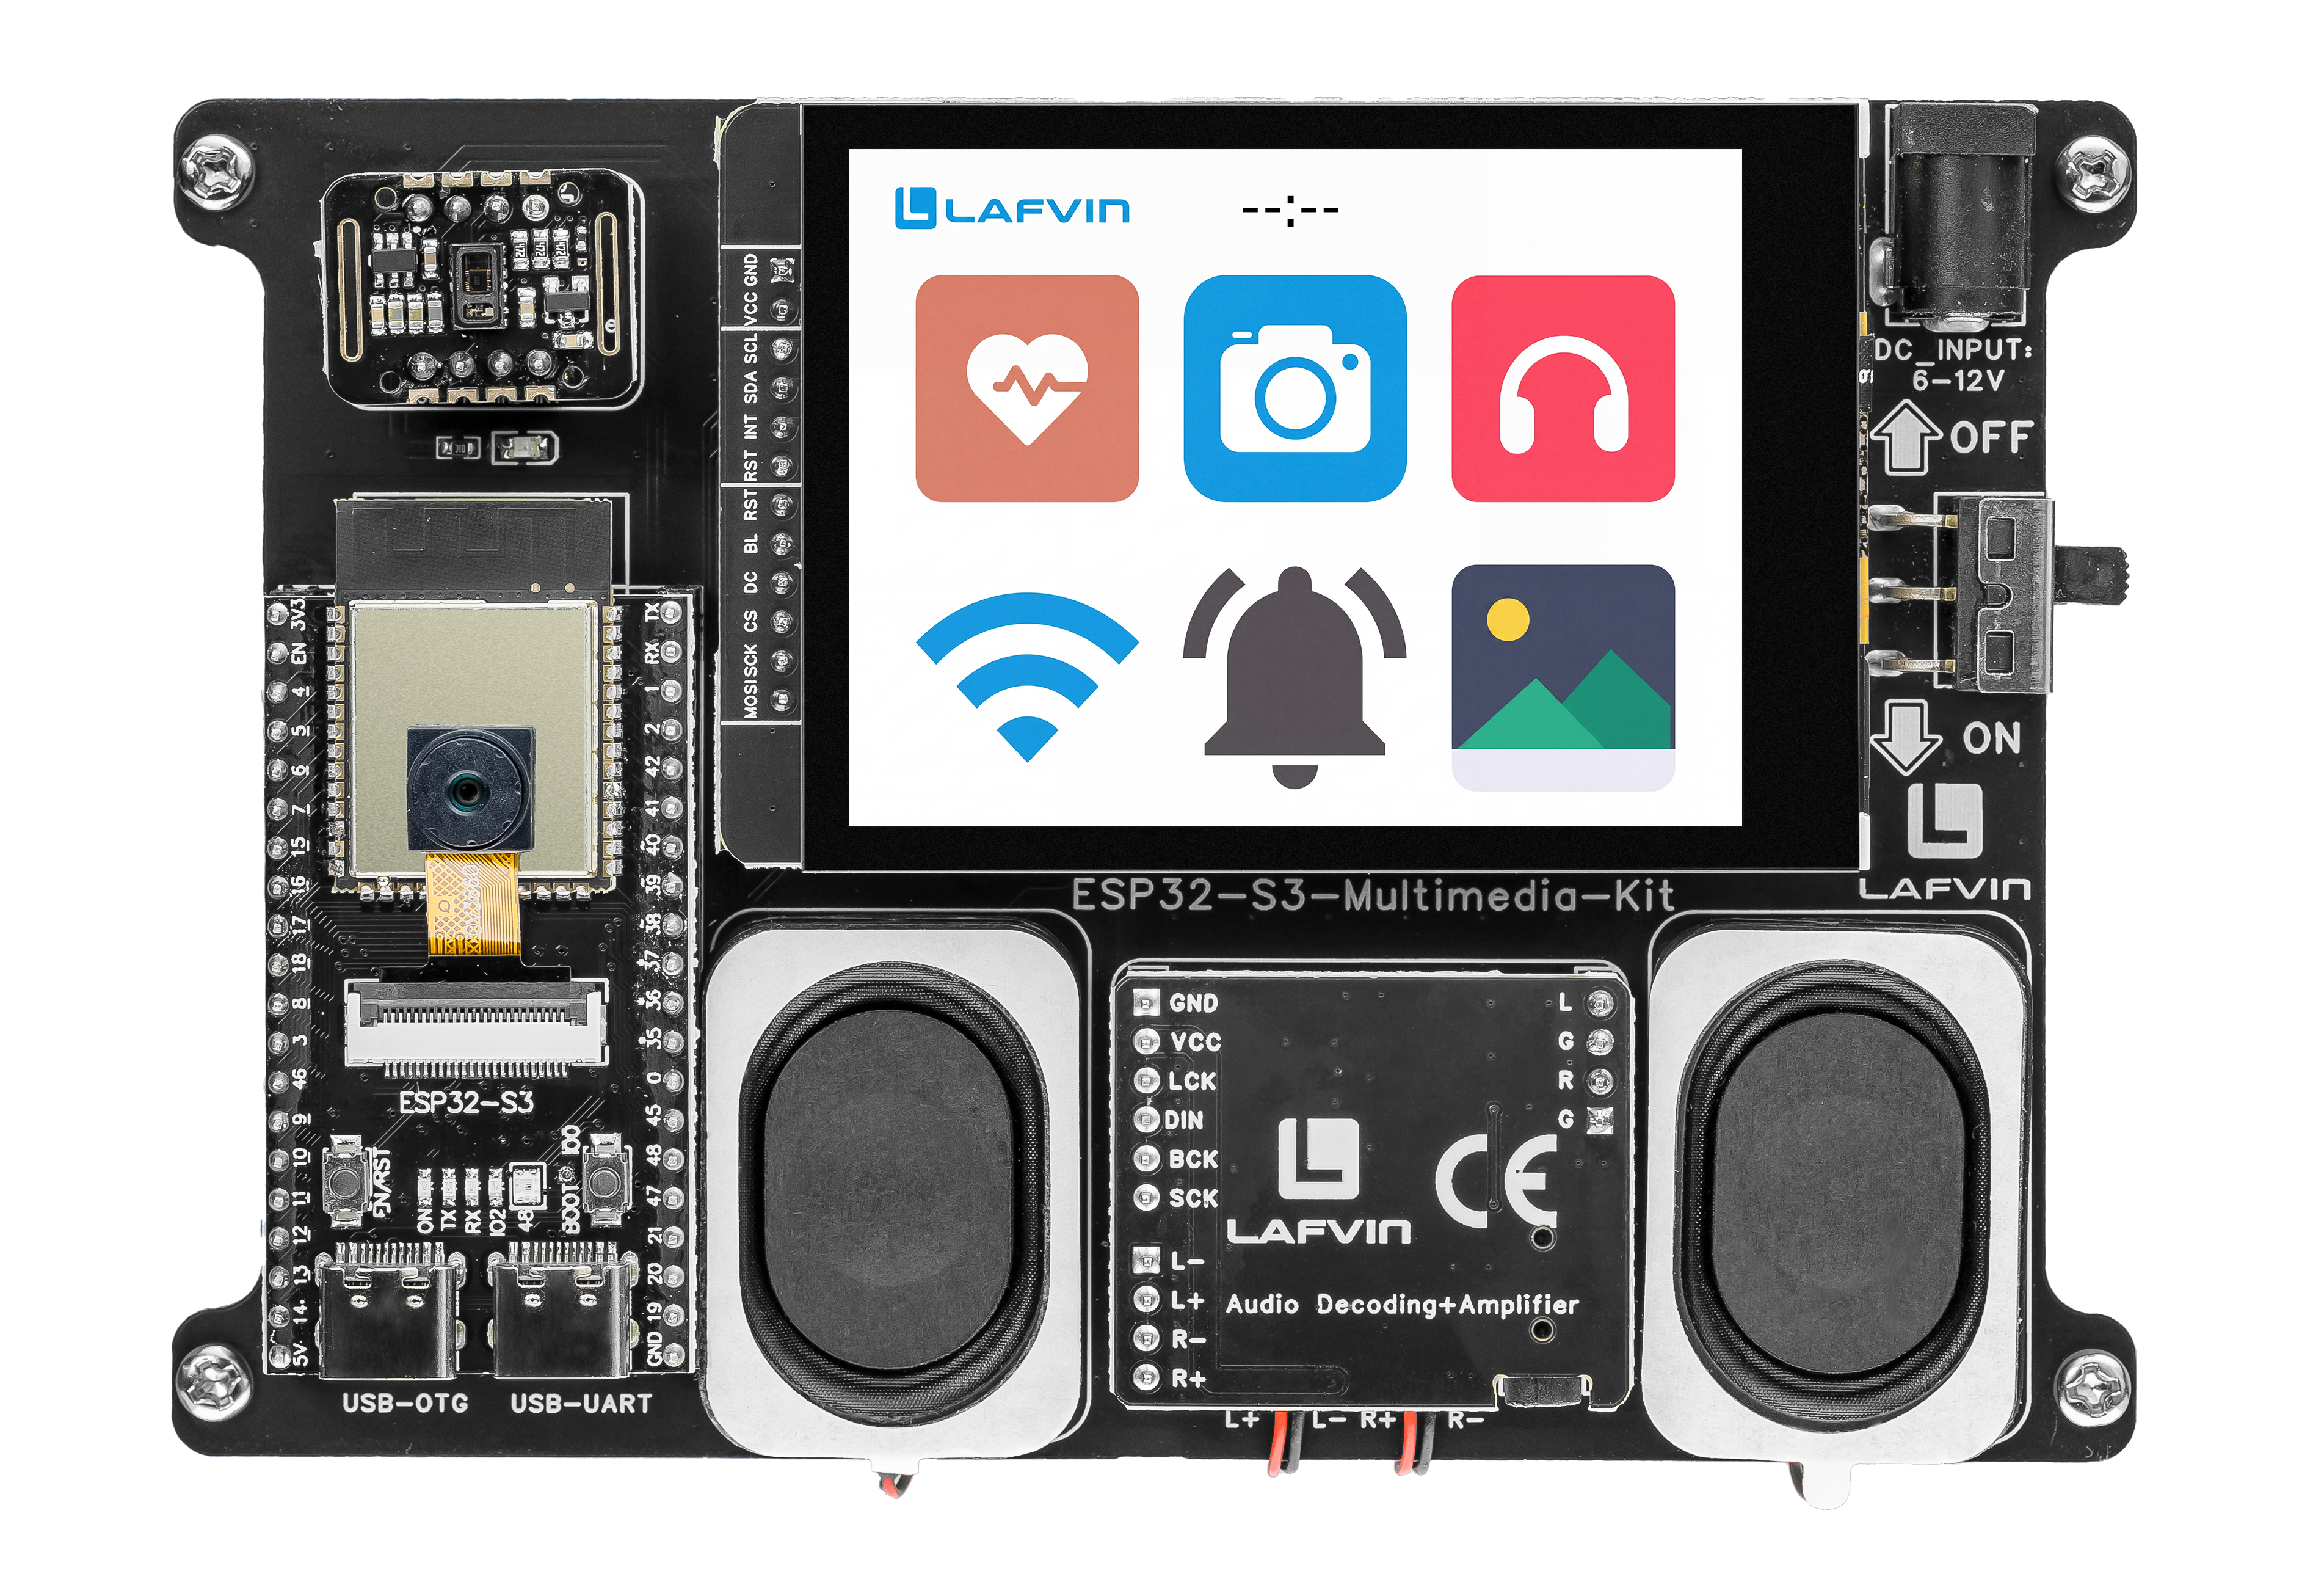
This is the ultimate project that ties together everything you have built. It creates a home screen with two pages of app icons, each launching one of the previous projects: Camera, Gallery, Music, HeartRate, RGB, Buzzer, WiFi, and File Manager. It includes a status bar with WiFi indicator and real-time clock.
What You’ll Learn
Building an app launcher with LVGL tileview and paginated screens
Lazy-loading: initialising modules only when first launched
Managing screen transitions and properly stopping background tasks
NTP time synchronisation for a live clock
Structuring a large, multi-module embedded application
Before You Begin
Complete the setup steps in Preparation before continuing.
Note
Use the recommended Arduino IDE settings in Recommended Board Settings unless this lesson says otherwise.
Open the example sketch from the code package:
LAFVIN-ESP32-S3-Multimedia-Kit-main/2.LVGL/15_LVGL_All_In_One/15_LVGL_All_In_One.ino
Note
This sketch uses all board peripherals. You need a Micro SD card with the proper folder structure for Gallery, Music, and Camera.
Upload and Test
Insert a FAT32-formatted Micro SD card (with
/music/and/picture/folders if you want to use those apps).Connect the board with a USB Type-C data cable.
Open
15_LVGL_All_In_One.inoin Arduino IDE.In the Tools menu, select
ESP32S3 Dev Moduleas the board and choose the correct serial port.Click Upload.
After uploading, the home screen shows:
Status bar at the top with Wi-Fi icon and current time
Two tile pages (swipe left/right to switch):
Page 1: HeartRate, Camera, Music, WiFi, Buzzer, Gallery
Page 2: RGB, File Manager
Tap any app icon to launch the full application, identical to the standalone version you built in the earlier lessons. Tap the back/home button to return to the launcher.
How the Code Works
The launcher UI logic is mainly implemented in LAFVIN-ESP32-S3-Multimedia-Kit-main/2.LVGL/15_LVGL_All_In_One/home_ui.cpp and LAFVIN-ESP32-S3-Multimedia-Kit-main/2.LVGL/15_LVGL_All_In_One/all_in_one_app.cpp.
Launcher Targets
The first home page defines six app targets. These enum values are later used when creating the icon buttons.
const AppScreen kPageOneTargets[6] = {
  APP_SCREEN_HEARTRATE,
  APP_SCREEN_CAMERA,
  APP_SCREEN_MUSIC,
  APP_SCREEN_WIFI,
  APP_SCREEN_BUZZER,
  APP_SCREEN_GALLERY,
};
These targets are used to build the launcher page and decide which full app to open after a tap.
Page Switching
The tileview callback tracks which launcher page is currently active. This lets the home screen return to the same page after leaving an app.
void tileview_event_handler(lv_event_t *e) {
  if (lv_event_get_code(e) != LV_EVENT_VALUE_CHANGED) {
    return;
  }

  // Store the active page so returning from a child module restores the same page.
  lv_obj_t *active_tile = lv_tileview_get_tile_act(g_home_ui.tileview);
  if (active_tile == g_home_ui.page_two) {
    s_current_page = 1;
  } else {
    s_current_page = 0;
  }

  all_in_one_set_home_page(s_current_page);
}
Opening an App
When the user taps an icon, the launcher opens the selected module. The camera branch below shows the lazy-loading pattern used in this project.
void all_in_one_open_screen(AppScreen screen) {
  ensure_home_ready();

  // Treat a request for HOME as a normal back-to-home action.
  if (screen == APP_SCREEN_HOME) {
    all_in_one_show_home();
    return;
  }

  // Stop the currently active module before opening another one.
  before_switch_from(s_current_screen);

  switch (screen) {
    case APP_SCREEN_CAMERA:
      ensure_sd_ready();
      ensure_camera_ready();
      if (!s_camera_initialized) {
        all_in_one_show_home();
        return;
      }
      if (!s_camera_ready) {
        camera_ui_setup(&g_camera_ui);
        s_camera_ready = true;
      }
      camera_task_start();
      break;
This pattern is repeated for Gallery, Music, HeartRate, RGB, Buzzer, WiFi, and File Manager, with each module initialized only when it is needed.
Stopping Background Tasks
Before switching screens, the app stops any background tasks that should not keep running.
void before_switch_from(AppScreen screen) {
  // Stop hardware or timing loops that should not keep running in the background.
  if (screen == APP_SCREEN_CAMERA && camera_task_is_running()) {
    camera_task_stop();
  }
  if (screen == APP_SCREEN_HEARTRATE) {
    hartrate_ui_stop();
  }
  if (screen == APP_SCREEN_MUSIC) {
    music_ui_stop();
  }
  if (screen == APP_SCREEN_RGB) {
    rgb_ui_stop();
  }
}
This prevents the previous module from continuing to use CPU time or hardware resources after the user leaves it.
Wi-Fi Starts NTP
After Wi-Fi connects successfully, the project enables NTP time synchronization for the status bar clock.
void all_in_one_notify_wifi_connected(void) {
  if (s_ntp_requested) {
    return;
  }

  // Use China Standard Time and start NTP once WiFi is confirmed.
  setenv("TZ", "CST-8", 1);
  tzset();
  configTime(8 * 3600, 0, "ntp.aliyun.com", "pool.ntp.org");
  s_ntp_requested = true;
  s_ntp_synced = false;
  s_last_clock_refresh_ms = 0;
}
Refreshing the Clock
The launcher updates the clock once per second and shows --:-- until NTP time becomes valid.
void refresh_clock_label(void) {
  // Update the clock at a steady 1 Hz pace to avoid unnecessary redraws.
  if (millis() - s_last_clock_refresh_ms < 1000) {
    return;
  }
  s_last_clock_refresh_ms = millis();

  if (!s_ntp_requested) {
    home_ui_set_time_text("--:--");
    return;
  }

  time_t now = time(nullptr);
  if (now < 100000) {
    home_ui_set_time_text("--:--");
    return;
  }

  s_ntp_synced = true;

  struct tm time_info;
  localtime_r(&now, &time_info);
  char buffer[6];
  strftime(buffer, sizeof(buffer), "%H:%M", &time_info);
  home_ui_set_time_text(buffer);
}
In the provided sketch:
Each module is initialised only when first tapped, saving memory and startup time
The tileview fires
LV_EVENT_VALUE_CHANGEDwhen the user swipes pages, which updatess_current_pagescreen_for()maps eachAppScreenenum value to the actual LVGL screen objectNTP time sync uses China Standard Time (CST-8) with
ntp.aliyun.comas the primary server
Try This Next
Add a third page with utility apps (settings, about, help)
Customise app icons with your own images
Add a battery indicator to the status bar using ADC readings from 1.2 ADC Battery Monitor
Create your own custom app and add it to the launcher