Install Arduino IDE
Download Arduino IDE 2.x
Visit the Arduino Software page.
Download the latest Arduino IDE 2.x release for your operating system.
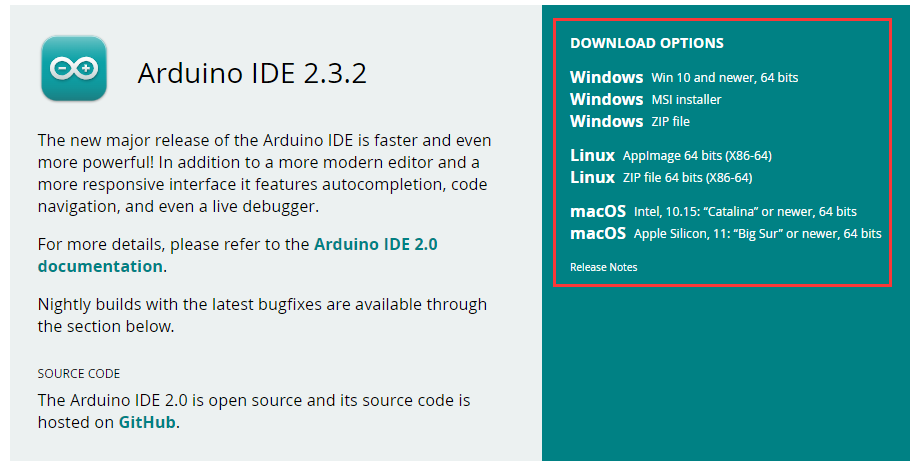
Installation
Windows
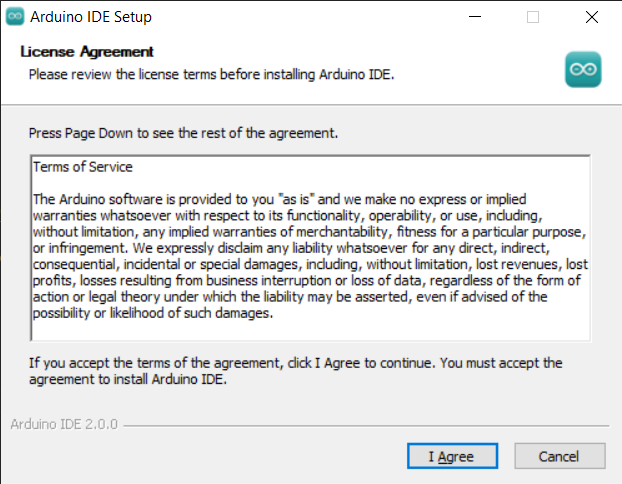
Double-click the downloaded
arduino-ide_xxxx.exefile.Read the license agreement and continue.
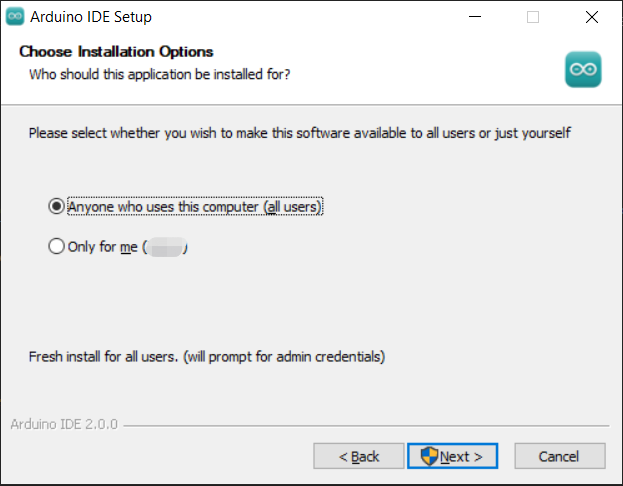
Choose the installation options.
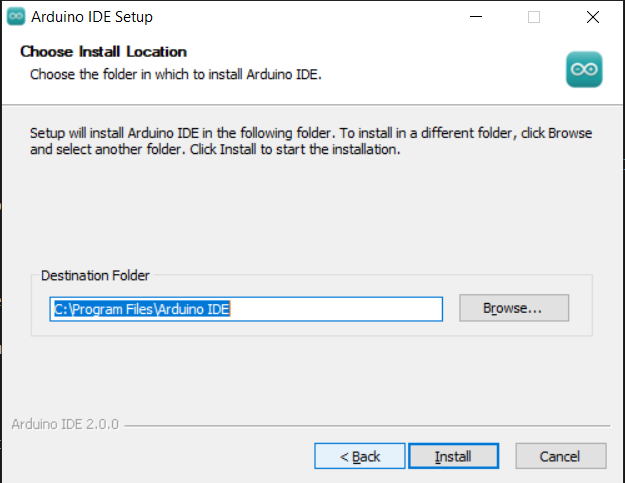
Choose the installation location. Installing outside the system drive is recommended when possible.
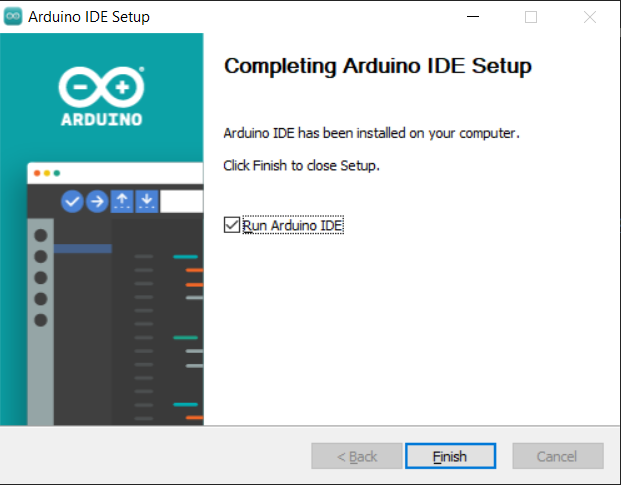
Finish the installation.
macOS
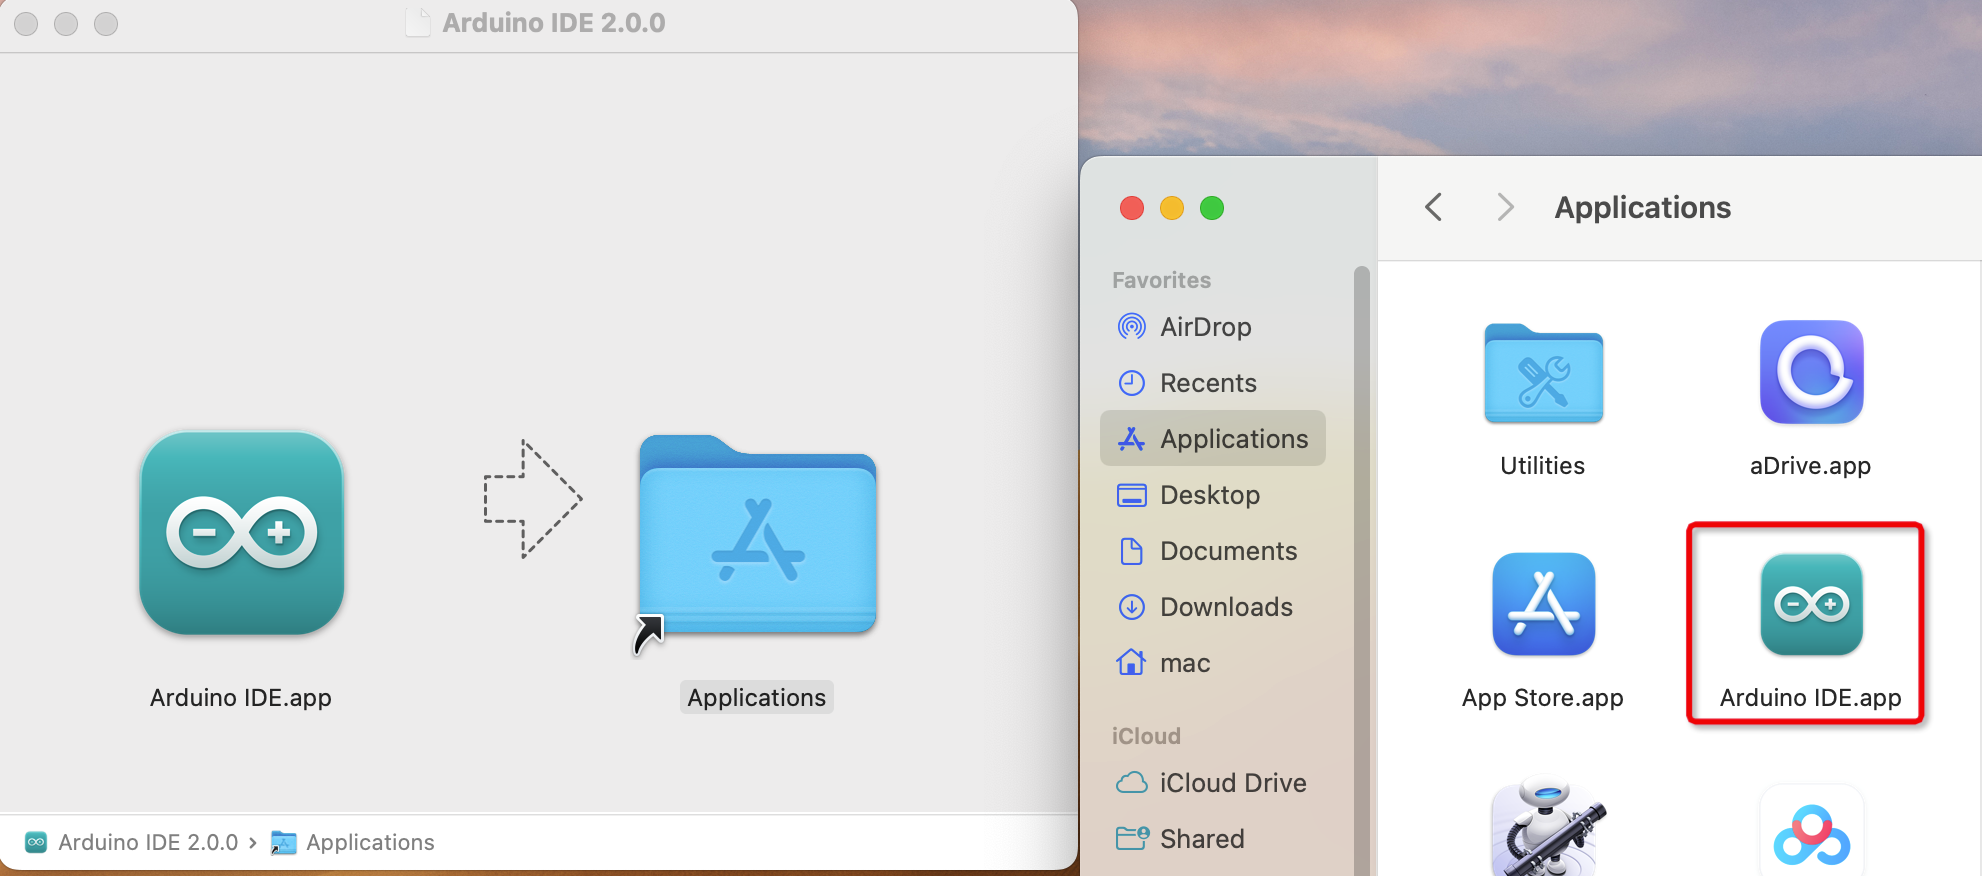
Double-click the downloaded arduino_ide_xxxx.dmg file and copy Arduino IDE.app to the Applications folder.
Linux
For Linux installation instructions, refer to the official Arduino guide: Linux Installation Guide
Open Arduino IDE
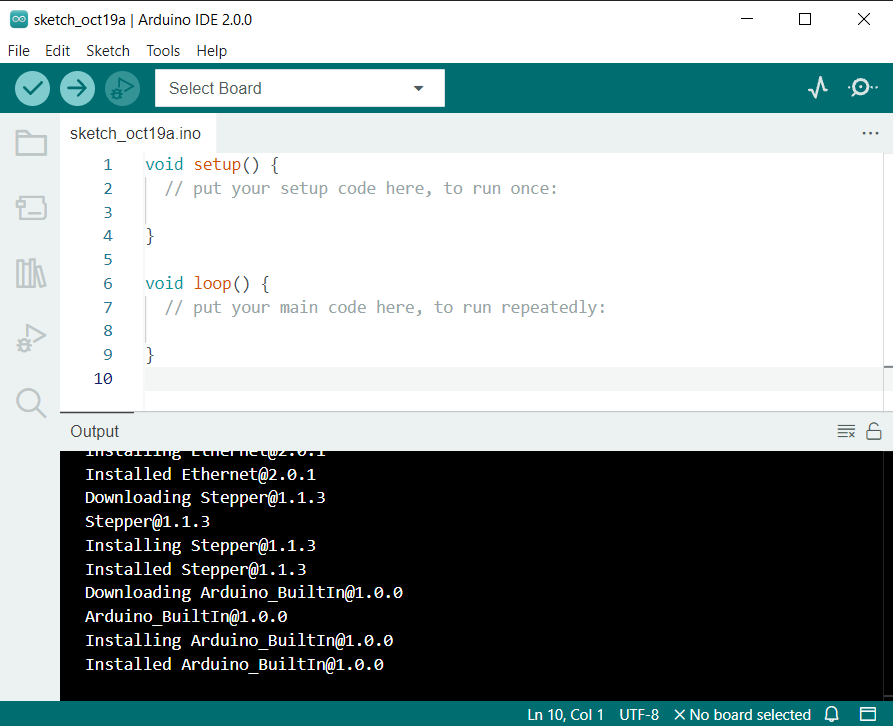
When you open Arduino IDE for the first time, it automatically installs the built-in board packages and required files.
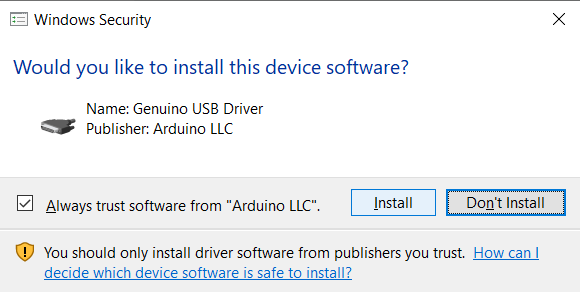
Your firewall or security software may ask whether to install drivers or allow access. Approve these prompts if needed.
Arduino IDE is now ready to use.
Note
If some components fail to install because of a network problem, close and reopen Arduino IDE. It will continue the installation automatically.
Environment Configuration
First, open Arduino IDE, click File > Preferences, and find Additional Boards Manager URLs.
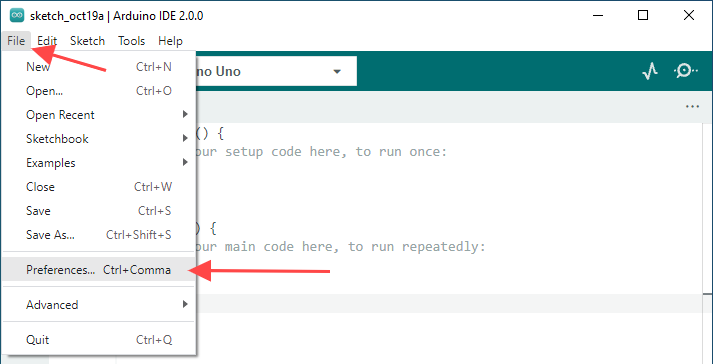
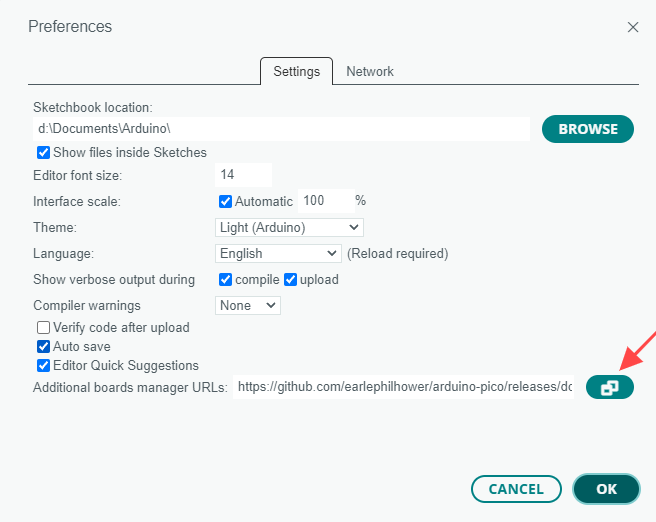
Click the icon next to that field.
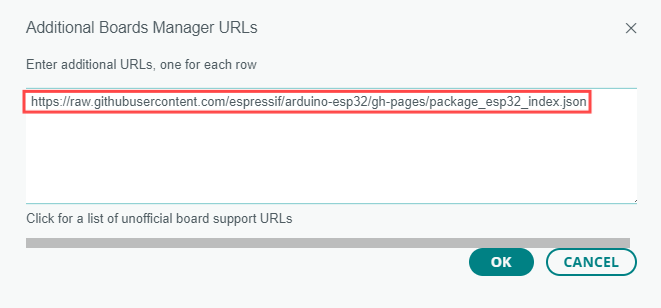
Add the following URL, click OK, and then click OK again in the Preferences window.
https://raw.githubusercontent.com/espressif/arduino-esp32/ghpages/package_esp32_index.json
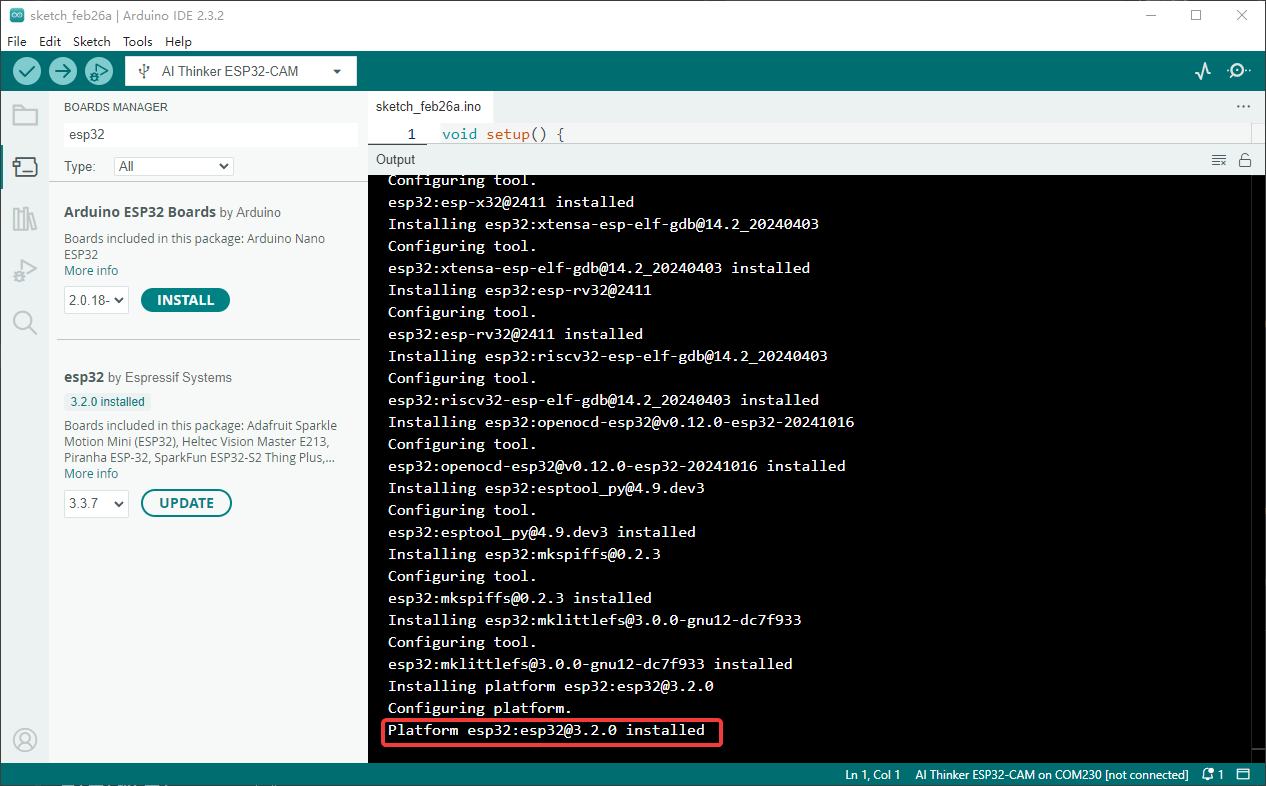
Open Boards Manager, search for esp32, find esp32 by Espressif Systems, select version 3.2.0, and click Install.
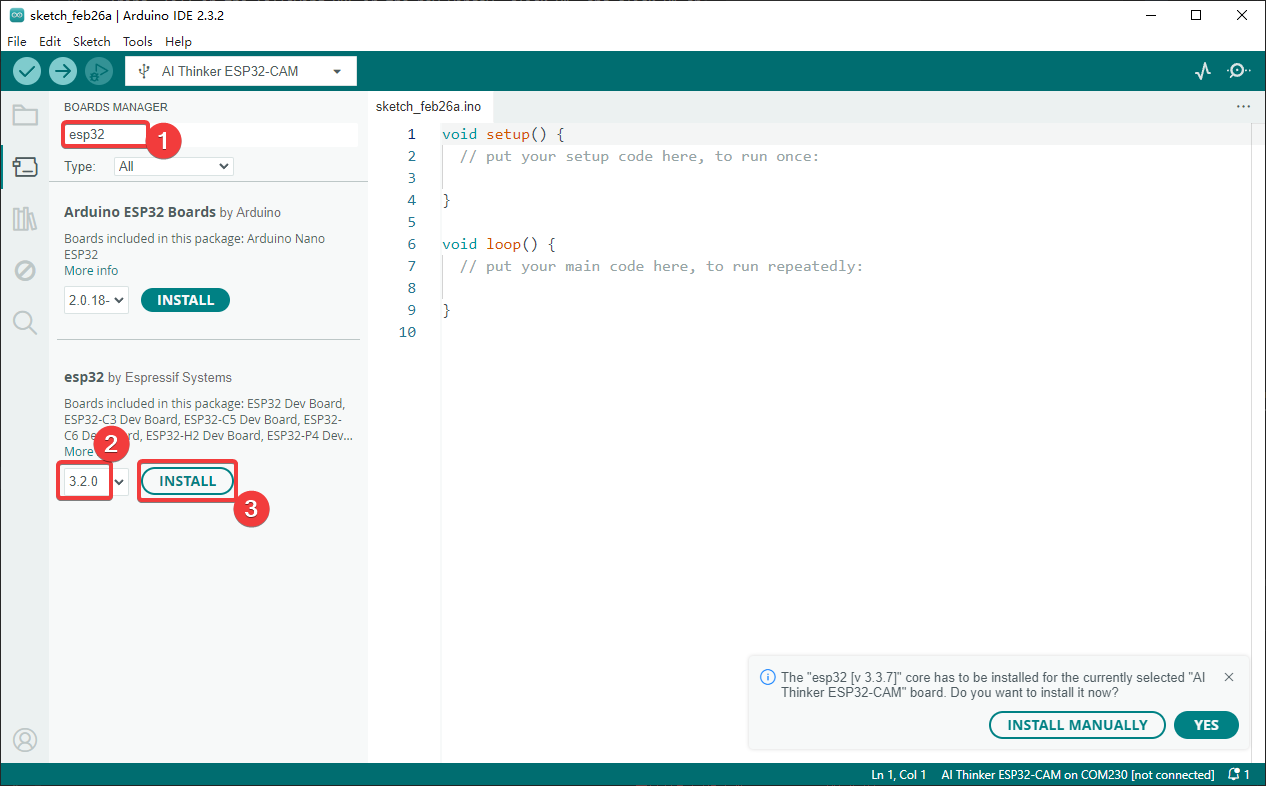
Arduino IDE will download the required files automatically. Wait for the installation to complete.
Warning
Install esp32 by Espressif Systems version 3.2.0. Other versions may compile successfully but can cause upload, USB, PSRAM, display, camera, or LVGL compatibility problems with this kit.
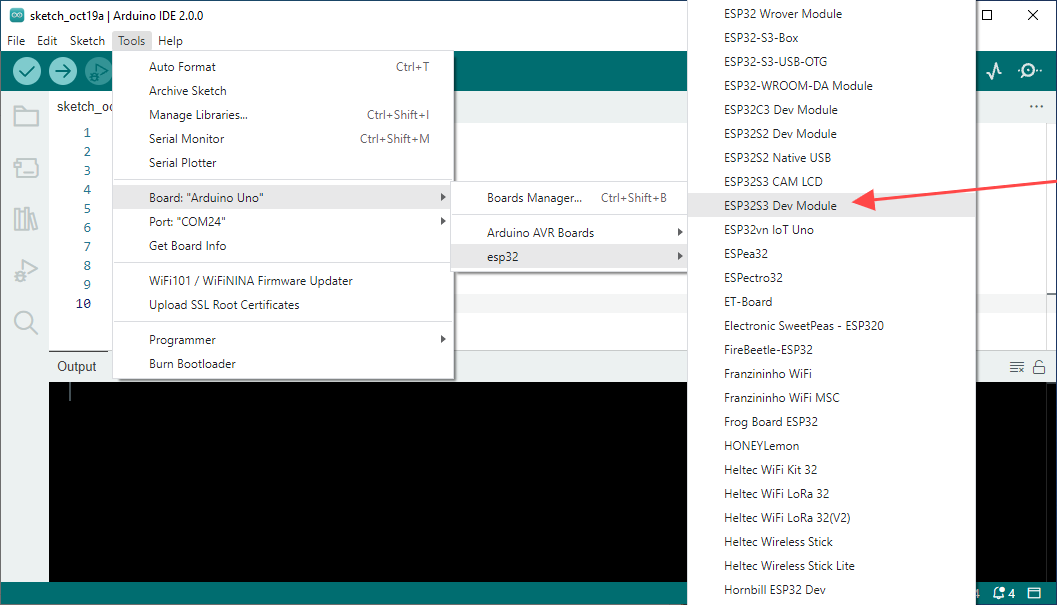
When the installation finishes, open Tools > Board, expand the ESP32 board list, and select ESP32S3 Dev Module.
Recommended Board Settings
For this kit, we recommend using the following Arduino IDE board settings for all tutorials unless a specific lesson says otherwise.
Setting |
Recommended Value |
|---|---|
ESP32 Core Version |
|
Board |
|
CPU Frequency |
|
Flash Size |
|
PSRAM |
|
Partition Scheme |
|
Upload Mode |
|
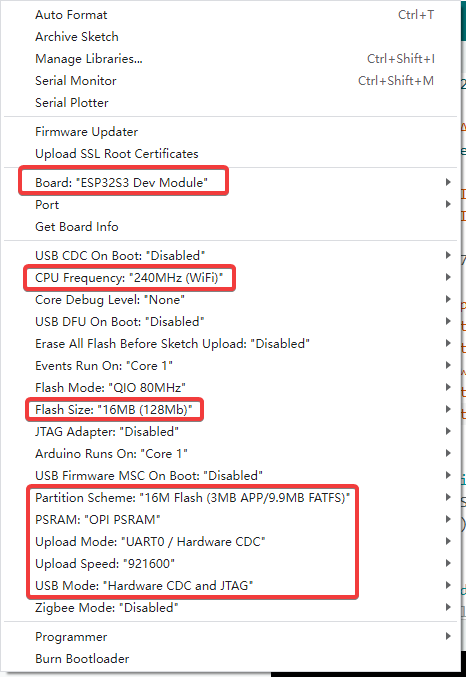
These settings are recommended because this kit includes display, touch, camera, SD card, audio, and LVGL demos that require enough flash space, PSRAM, and a FATFS partition for larger examples.
Note
If a tutorial does not mention a different configuration, use these settings by default.
For advanced users, the key Arduino CLI board configuration is:
esp32:esp32:esp32s3:FlashSize=16M,PSRAM=opi,PartitionScheme=app3M_fat9M_16MB