2.2 Label and Button Controls
Build an interactive UI with clickable buttons and a dynamic counter label.
Overview
This example introduces interactive widgets. You will create a counter controlled by plus and minus buttons, plus “Show” and “Color” buttons that demonstrate LVGL’s text formatting features — including inline colour codes.
What You’ll Learn
Creating and configuring buttons (
lv_btn)Attaching event callbacks to respond to touch
Updating label text at runtime with
lv_label_set_text_fmt()Using LVGL text recolouring (
#FF0000 text#syntax)
Before You Begin
Complete the setup steps in Preparation before continuing.
Note
Use the recommended Arduino IDE settings in Recommended Board Settings unless this lesson says otherwise.
Open the example sketch from the code package:
LAFVIN-ESP32-S3-Multimedia-Kit-main/2.LVGL/02_LVGL_Lable/02_LVGL_Lable.ino
Upload and Test
Connect the board with a USB Type-C data cable.
Open
02_LVGL_Lable.inoin Arduino IDE.In the Tools menu, select
ESP32S3 Dev Moduleas the board and choose the correct serial port.Click Upload.
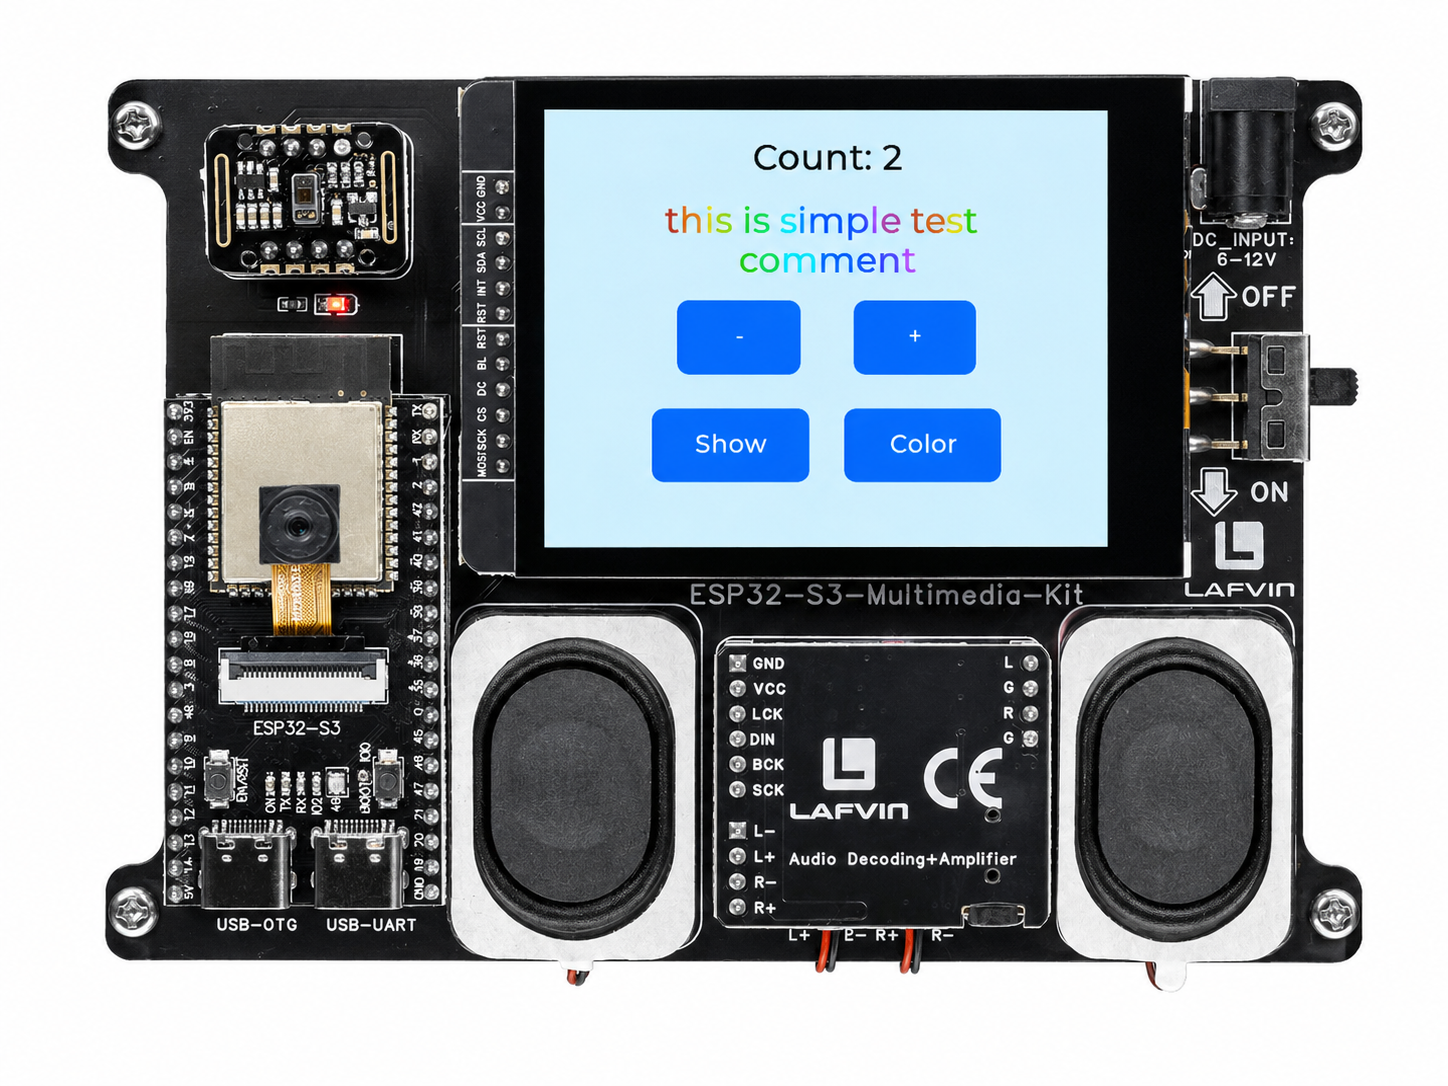
After uploading, the screen shows:
A counter label (e.g., “Count: 0”) with + and - buttons
A “Show” button — tap it to display a plain text message
A “Color” button — tap it to display rainbow-coloured text
How the Code Works
The demo is self-contained in 02_LVGL_Lable.ino.
Shared Event Handler
All four buttons share a single event_handler() callback. Each button passes a unique integer ID as user data (1 for increment, -1 for decrement, 2 for Show, 3 for Color). The callback switches on this ID to determine the action.
static void event_handler(lv_event_t * e) {
  lv_event_code_t code = lv_event_get_code(e);

  if(code == LV_EVENT_CLICKED) {
    intptr_t btn_id = (intptr_t)lv_event_get_user_data(e);

    switch (btn_id) {
      case 1: // Count +
        count_val++;
        lv_label_set_text_fmt(label_count, "Count: %d", count_val);
        break;

      case -1: // Count -
        count_val--;
        lv_label_set_text_fmt(label_count, "Count: %d", count_val);
        break;

      case 2: // Show Black Text
        lv_label_set_recolor(label_comment, false);
        lv_label_set_text(label_comment, "this is simple test comment");
        lv_obj_set_style_text_color(label_comment, lv_color_black(), 0);
        break;

      case 3: // Show Colorful Text
        lv_label_set_recolor(label_comment, true);
        lv_label_set_text(label_comment, colored_text);
        break;
    }
  }
}
Buttons are created with the ID passed as the last argument to lv_obj_add_event_cb():
lv_obj_add_event_cb(btn_plus, event_handler, LV_EVENT_CLICKED, (void*)1);
lv_obj_add_event_cb(btn_minus, event_handler, LV_EVENT_CLICKED, (void*)-1);
lv_obj_add_event_cb(btn_show, event_handler, LV_EVENT_CLICKED, (void*)2);
lv_obj_add_event_cb(btn_color, event_handler, LV_EVENT_CLICKED, (void*)3);
Text Recolouring
LVGL supports inline colour formatting with the #RRGGBB text# syntax. The sketch defines a long colored_text constant that spells out “this is simple test comment” with each character in a different hue. The Color button enables recolouring mode and sets this string; the Show button disables it and reverts to plain black text.
const char * colored_text =
    "#FF0000 t##FF8000 h##FFFF00 i##80FF00 s# "
    "#00FF00 i##00FF80 s# "
    "#00FFFF s##0080FF i##0000FF m##8000FF p##FF00FF l##FF0080 e# "
    "#FF0000 t##FF8000 e##FFFF00 s##80FF00 t# "
    "#00FF00 c##00FF80 o##00FFFF m##0080FF m##0000FF e##8000FF n##FF00FF t#";
The counter label uses lv_label_set_text_fmt() for formatted integer display, while the comment label uses lv_label_set_long_mode(LV_LABEL_LONG_WRAP) with a fixed width of 220 px to allow automatic line wrapping.
In the provided sketch:
count_valis a static global, initialised to0The four buttons are arranged: plus/minus centred in the upper half, Show/Color in the lower half
lv_label_set_recolor(label_comment, true)must be called before the#RRGGBBcodes are interpreted
Try This Next
Add a reset button that sets the counter back to 0
Experiment with more colour codes:
#0000FF,#FF00FF,#00FFFFUse
lv_label_set_long_mode()to see how long text wraps